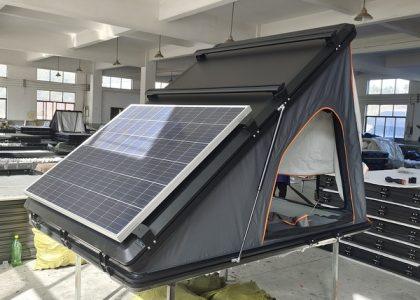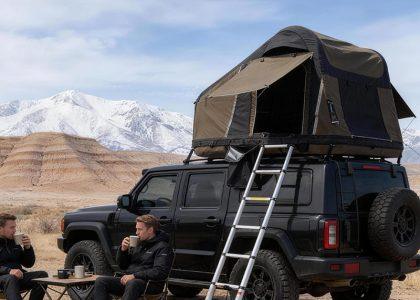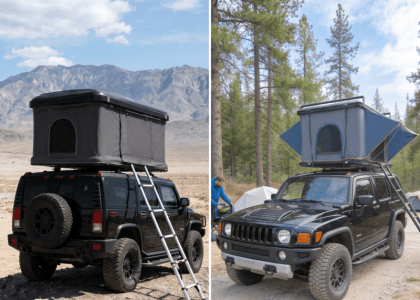
A professional rooftop-tent installation starts long before the tent is lifted onto the vehicle.
For an off-road shop, 4×4 store, truck upfitter, or rooftop-tent dealer, the goal is not simply to get the tent mounted. The shop has to verify the complete vehicle-to-tent system, use the correct mounting hardware and product-specific specifications, test the installation, document the work, and explain the system to the customer.
A useful way to think about the load path is:
vehicle → roof/bed/canopy mounting structure → rack or crossbars → mounting hardware → rooftop tent
The shop should verify every component in that path and follow the most restrictive applicable rating or limitation from the vehicle, rack, mounting system, and tent documentation.
Professional fitment guidance from Cap-it, Thule, and other current manufacturers follows this system-level approach rather than treating the tent as an isolated product.
This checklist is written as a professional workshop SOP, not a consumer DIY guide.
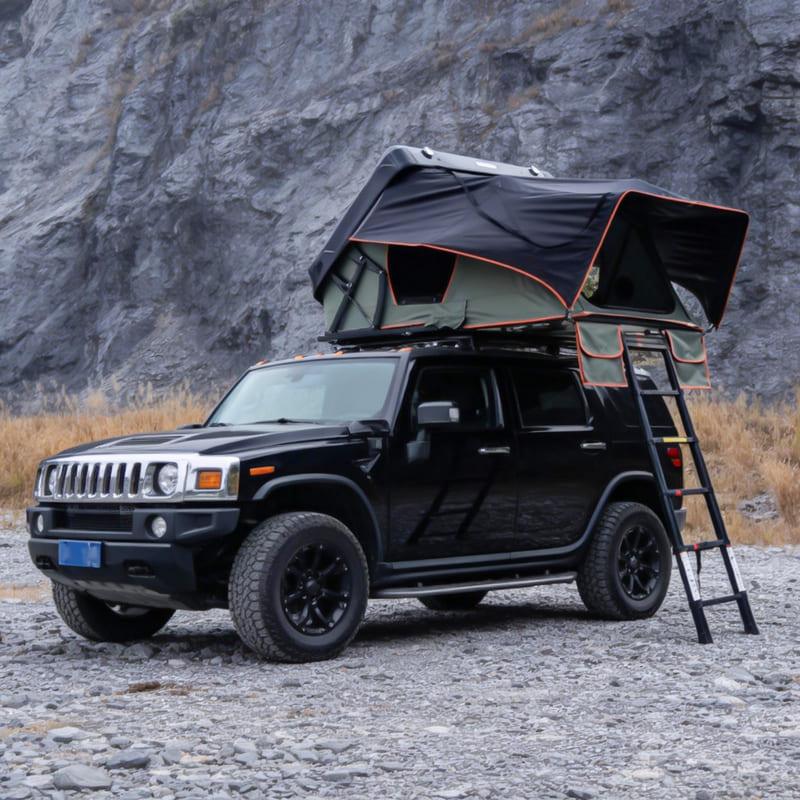
Quick Professional Rooftop Tent Installation Checklist
Before calling an RTT installation complete, verify all of the following:
- Identify the exact vehicle and mounting location.
- Verify the applicable vehicle roof or mounting-load guidance.
- Verify the rack, platform, bed rack, or canopy rating.
- Confirm the exact tent travel weight.
- Measure crossbar width, height, and spacing.
- Check tent footprint and all vehicle/accessory clearances.
- Plan safe lifting and positioning.
- Install only the approved mounting hardware.
- Tighten to the exact manufacturer-specified torque.
- Fully deploy and close the tent.
- Perform a static movement check and short road check.
- Complete customer handover and document the installation.
The key difference between a professional installation and a casual installation is traceability.
A shop should be able to explain not only how the tent was installed, but also why the vehicle, rack, hardware, and tent were considered compatible.
Do Not Install the Rooftop Tent If These Conditions Are Unresolved
A professional SOP should define when the technician must stop.
1. Vehicle Load Information Cannot Be Verified
Do not substitute:
- payload capacity;
- GVWR;
- cargo capacity;
- a similar vehicle’s specification;
- forum estimates
for the applicable roof or mounting-system guidance.
Thule instructs installers to verify vehicle dynamic roof capacity using vehicle documentation or manufacturer/dealer information in its rooftop-tent fitment guidance.
Record the source used.
For example:
Vehicle dynamic roof guidance verified in owner’s manual, page XX.
If the relevant information cannot be confirmed, pause the installation.
2. Rack or Crossbar Capacity Is Unknown
A high-rated tent or platform does not override an unknown or lower-rated component elsewhere in the load path.
Verify as applicable:
- tracks;
- rack feet;
- crossbars;
- platform;
- bed rack;
- canopy structure;
- mounting hardware.
If the rack cannot be identified or its intended load cannot be confirmed, do not proceed.
For more detail on this part of the system, see our guide to roof rack requirements for rooftop tents.
3. Crossbar Geometry Is Outside the Tent Specification
A mounting bracket physically fitting around a crossbar does not automatically make the installation approved.
Measure:
- bar width;
- bar height;
- front-to-back spacing;
- side-to-side positioning where required;
- mounting-bracket clearance.
Current iKamper Skycamp installation guidance demonstrates why this must be model-specific: different Skycamp configurations use different rack-load, spacing, and mounting-bracket requirements.
The workshop rule is simple:
There is no universal rooftop-tent crossbar spacing.
4. The Rack or Mounting Structure Is Damaged
Pause the job if you find:
- cracked crossbars;
- bent rack components;
- loose rack feet;
- damaged tracks;
- deformed brackets;
- significant corrosion;
- damaged vehicle mounting points.
Do not attempt to solve an existing structural problem by tightening the RTT hardware harder.
5. Correct Mounting Hardware Is Missing
Do not improvise with random fasteners simply because the thread or hole appears to fit.
Confirm:
- correct bracket;
- correct mounting plate;
- correct bolt;
- required washers;
- locking hardware;
- product-specific adapters.
Different systems use different hardware and torque requirements.
6. Required Clearance Cannot Be Maintained
Before final installation, check:
- rear hatch;
- tailgate;
- canopy door;
- antenna;
- awning;
- solar panels;
- roof boxes;
- recovery equipment;
- ladder deployment zone.
A tent can fit on a rack while still making the vehicle difficult or unsafe to use.
7. The Shop Cannot Lift or Position the Tent Safely
Handling requirements should come from:
- actual tent mass;
- dimensions;
- vehicle height;
- installation height;
- number of available technicians;
- shop lifting equipment.
IRONMAN 4X4’s dealer workshop guidance discusses work platforms, multiple-person handling, and lifting equipment such as hoists or forklifts for its own RTT installation context.
Those examples should not be converted into a universal weight threshold.
The correct rule is:
Create a lifting plan for the exact tent and workshop—not a generic “two people can lift any RTT” rule.
Stage 1: Record the Vehicle and Mounting Configuration
Before touching the tent, document the vehicle.
The work order should include:
- year;
- make;
- model;
- relevant trim;
- body style;
- roof type;
- panoramic roof or sunroof;
- pickup-bed configuration;
- canopy model if fitted;
- existing rack make/model.
Avoid job-sheet descriptions such as:
Tacoma with a rack.
Model year and mounting configuration matter.
Identify the Exact Mounting Location
Common configurations include:
- SUV roof;
- pickup cab;
- bed rack;
- canopy;
- full platform rack.
Each creates a different load path.
For pickup installations, also inspect:
- cab-to-rack height;
- tailgate clearance;
- tonneau compatibility;
- canopy access;
- rear overhang.
Stage 2: Verify the Vehicle and Rack System
Document the source of the applicable vehicle guidance.
Then verify each relevant rack component individually.
Depending on the installation, that may include:
- track rating;
- rack-foot rating;
- crossbar rating;
- platform rating;
- canopy rating;
- bed-rack rating.
Do not write only:
Rack OK.
Record what was checked and where the specification came from.
Stage 3: Confirm the Exact Rooftop Tent Travel Weight
Use the current specification for the exact model being installed.
Do not substitute:
- shipping weight;
- gross carton weight;
- another tent size;
- another generation;
- an old product listing.
Record:
- tent brand/model;
- published travel or net weight;
- whether the ladder is included;
- whether removable accessories are included.
This is especially important for modular and lightweight RTTs because brands may define published product weight differently.
For comparison research, see our lightest rooftop tent guide.
Stage 4: Measure Crossbar Width, Height, and Spread
Never rely on visual inspection alone.
Measure and record:
- crossbar width;
- crossbar height;
- front-to-back spread;
- mounting-zone position.
Then compare the measurements with the exact tent instructions.
Both Thule and iKamper publish model-specific fitment requirements.
If a bracket must be forced around a bar outside the approved profile, stop and correct the fitment rather than modifying the mounting system on the fly.
Stage 5: Check Tent Footprint and Vehicle Clearance
Before final tightening, compare the closed tent dimensions with the actual support area.
Check:
- front overhang;
- rear overhang;
- rack support location;
- rear hatch;
- antenna;
- sunroof;
- awning;
- solar panels;
- roof accessories.
Also simulate the deployed configuration.
Ask:
- Which side will the ladder drop?
- Does the tent open over a door?
- Will it interfere with an awning?
- Can the rear hatch still open?
- Can a truck canopy door operate?
Roofnest’s installation guide includes product-specific guidance on support and overhang, which is a useful example of why shops should follow the exact manufacturer’s instructions rather than invent a universal overhang percentage.
Stage 6: Create the Workshop Lifting Plan
Decide how the RTT will reach the mounting surface before unpacking and lifting it.
Depending on the product and shop, the plan may include:
- multiple technicians;
- padded work platforms;
- rolling stands;
- lifting straps;
- hoist;
- forklift.
Roofnest, for example, publishes its own lifting guidance in its installation instructions, including additional-person recommendations for very heavy tents.
Those are Roofnest-specific instructions, not an industry-wide lifting rule.
Protect the Vehicle
Before lifting, protect:
- painted roof edges;
- doors;
- fenders;
- glass;
- nearby body panels;
- rack contact zones.
Create a clean staging area for hardware.
A technician should not be searching for a missing bracket while the tent is suspended over the vehicle.
Stage 7: Inspect All Mounting Hardware
Before lifting the tent, lay out:
- brackets;
- mounting plates;
- channel sliders;
- bolts;
- washers;
- nuts;
- locks;
- spacers;
- adapters.
Compare quantities against the installation manual.
Missing hardware should be discovered on the workbench—not after the tent is already on the rack.
Stage 8: Position the Tent Before Final Tightening
Once the tent is resting on the rack, confirm:
- approved front/rear position;
- side-to-side position;
- opening direction;
- ladder zone;
- hatch clearance;
- awning clearance;
- support-point location.
Do not assume every RTT must be perfectly centered.
Some manufacturers may permit specific offsets; others may not.
Product-specific instructions control.
Stage 9: Use Only the Approved Mounting System
A professional SOP should never prescribe:
Use M8 bolts for every rooftop tent.
Different RTT systems use different:
- bolt diameters;
- bracket shapes;
- channel systems;
- locknuts;
- mounting plates.
Use only the hardware approved for the exact tent and rack combination.
Stage 10: Follow the Manufacturer’s Tightening Sequence
Where an opposed clamp system is used, follow the manufacturer’s tightening procedure.
For example, Roofnest’s installation instructions call for progressive tightening on both sides of its mounting brackets rather than fully tightening one side first.
Do not automatically transfer that exact procedure to every other bracket design.
The installation manual—not technician habit—should determine the sequence.
Stage 11: Apply and Record the Exact Torque
This should be a hard workshop rule:
There is no universal rooftop-tent mounting torque.
Fastener size, bracket geometry, materials, and rack interfaces differ.
For example, one specific ARB BASERACK RTT mounting system uses a defined torque value in its installation instructions. That value belongs to that system and should not be copied into an unrelated rooftop-tent installation.
The shop should record:
- specified torque;
- source document;
- technician;
- completion status.
Recommended Torque Record
| Mounting Point | Specified Torque | Source | Technician | Completed |
|---|---|---|---|---|
| Front left | Product-specific | Installation manual | — | □ |
| Front right | Product-specific | Installation manual | — | □ |
| Rear left | Product-specific | Installation manual | — | □ |
| Rear right | Product-specific | Installation manual | — | □ |
Avoid workshop notes such as:
Tightened securely.
That is not a specification.
Stage 12: Check Vehicle and Accessory Clearance Again
Before leaving the bay, operate everything that may interact with the RTT:
- rear hatch;
- tailgate;
- canopy door;
- side doors;
- awning;
- roof cargo;
- antenna.
Then verify travel mode:
- latches fully engaged;
- straps secured;
- travel cover secured;
- ladder secured;
- loose accessories removed or retained correctly.
Stage 13: Fully Deploy the Rooftop Tent
A professional installation is not complete while the tent remains closed.
Open the Tent Completely
Check:
- hinge movement;
- gas struts where applicable;
- fold-out platform;
- shell alignment;
- fabric movement.
Test the Ladder
Verify:
- attachment;
- locking system;
- ground contact;
- model-specific setup.
Do not publish one universal ladder angle.
Test Doors, Windows, Rainfly, and Awning Components
Look for:
- vehicle interference;
- fabric binding;
- zipper problems;
- pole/support interference;
- contact with accessories.
Close the Tent Again
Check:
- no fabric pinching;
- latches align;
- straps secure;
- cover closes correctly;
- ladder/accessories are stored properly.
A tent that opens correctly but cannot be packed down correctly has not passed installation QC.
Stage 14: Perform a Static Movement Check
Before road testing, physically inspect the mounted system.
Check for:
- sliding on the crossbars;
- bracket movement;
- loose plates;
- rack movement;
- hardware contacting the vehicle;
- incomplete latch engagement.
Do not claim that every installed RTT must have “zero vibration.”
The more useful standard is:
There should be no visible shifting between the rooftop tent, mounting hardware, and supporting rack.
Stage 15: Perform a Short Post-Installation Road Check
A short workshop quality-control drive can help identify:
- metallic clunking;
- abnormal rattling;
- loose cover straps;
- unexpected movement;
- obvious vibration changes.
After the drive, return the vehicle to the bay and inspect:
- brackets;
- fasteners;
- rack attachment points;
- latches.
This immediate road check does not replace the manufacturer’s required inspection or re-torque schedule.
Roofnest, for example, publishes its own initial hardware recheck interval in its installation guide.
Do not convert that manufacturer-specific interval into:
Re-torque every rooftop tent after 20 miles.
Instead:
Follow the tent and rack manufacturer’s specified initial and periodic inspection requirements.
If a customer later reports movement, rattling, or vibration, see our guide on rooftop tent shaking and rattling.
Customer Handover Is Part of the Installation
A professional installation is not finished when the technician puts away the tools.
The customer needs to understand the system.
Show the Mounting System
Point out:
- rack;
- mounting brackets;
- visible fasteners;
- latches.
The customer does not need to become an installer, but should understand what obvious looseness or movement looks like.
Demonstrate One Full Open-and-Close Cycle
Show:
- latch release;
- tent deployment;
- ladder setup;
- window/rainfly procedure where applicable;
- packing sequence;
- final latch/strap check.
Explain Manufacturer Inspection Requirements
Provide:
- installation manual;
- owner manual;
- initial inspection/recheck instructions;
- periodic inspection guidance.
Do not replace the manufacturer’s schedule with a shop-created universal interval.
Explain Warning Signs
Tell the customer to stop and inspect the system if:
- the tent shifts relative to the rack;
- a bracket becomes loose;
- a rack component cracks or bends;
- a latch cannot secure the tent;
- a new metal-on-metal clunk appears;
- the installed position visibly changes.
Rooftop Tent Installation Job Sheet
A professional shop should keep a simple installation record.
Vehicle
- Year:
- Make:
- Model:
- Body style:
- Roof/bed/canopy type:
Rack System
- Brand:
- Model:
- Mounting method:
- Published applicable rating:
- Rating source:
Rooftop Tent
- Brand:
- Model:
- Published travel/net weight:
- Closed dimensions:
- Mounting system:
Fitment Measurements
- Crossbar width:
- Crossbar height:
- Front-to-back spread:
- Hatch clearance checked:
- Tailgate/canopy clearance checked:
- Ladder deployment zone checked:
Mounting Hardware
- Correct mounting kit verified:
- All components present:
- Torque specification:
- Torque source:
Final Quality Control
- Tent opened:
- Tent closed:
- Ladder tested:
- Latches tested:
- Travel cover secured:
- Static movement check:
- Short road check:
- Final visual inspection:
Customer Handover
- Owner manual provided:
- Reinspection requirements explained:
- Open/close demonstration completed:
- Customer questions answered:
This type of record improves workshop consistency and creates a clearer reference if the vehicle returns for service.
Common Professional Rooftop Tent Installation Mistakes
1. Accepting an Unknown Rack
If the rack cannot be identified or verified, the complete load path cannot be verified.
2. Confusing Vehicle Payload With Roof Capacity
These are not interchangeable figures.
Use the applicable vehicle roof or mounting documentation.
3. Assuming Bar Spacing
Different tents use different mounting geometry.
Measure first.
4. Using Shipping Weight
Shipping weight can include:
- packaging;
- pallet;
- accessories.
Use the exact travel/net specification where available.
5. Improvising Hardware
Do not substitute random bolts, brackets, or adapters without manufacturer support.
6. Using a Generic Torque Value
There is no universal RTT mounting torque.
Use the exact product instructions.
7. Checking Clearance Too Late
Hatch, tailgate, ladder, and accessory interaction should be checked before final tightening.
8. Skipping the Deployment Test
A tent can look correctly mounted while closed and still interfere with the vehicle once deployed.
9. Skipping the Post-Installation Check
Static inspection and a short road check can reveal problems that are not obvious during initial assembly.
10. Failing to Document Customer Handover
If the customer leaves without knowing how to inspect, open, close, and recheck the system, the installation process is incomplete.
What Professional Installers Should Require From an RTT Supplier
Dealer installation becomes easier when the supplier provides complete technical documentation.
For every model, a professional installer should be able to obtain:
- exact travel/net weight;
- closed dimensions;
- open dimensions;
- mounting-rail dimensions;
- bracket drawings;
- hardware BOM;
- compatible crossbar geometry;
- spacing requirements;
- torque specifications;
- installation manual;
- replacement mounting hardware;
- revision/version information.
This is especially important when a dealer installs several generations or models.
If brackets, mounting rails, fasteners, or specifications change, the supplier should clearly identify the revision.
Manufacturer Perspective: Installation Documentation Is Part of the Product
For OEM and dealer programs, a rooftop tent is more than a physical shell, fabric body, mattress, and ladder.
The installation system is part of the product.
Everlead Outdoor develops hard-shell and soft-shell rooftop tents for OEM and ODM projects.
For dealer-focused programs, technical documentation should address project-specific information such as:
- product weight;
- mounting dimensions;
- bracket configuration;
- hardware specification;
- accessories;
- installation documentation;
- replacement hardware;
- packaging;
- product revisions.
For retailers and 4×4 shops, clearer documentation can reduce fitment uncertainty and make installation procedures easier to standardize.
The useful principle is:
Good installation documentation is part of the rooftop-tent product—not an optional PDF added after production.
Frequently Asked Questions
What should a professional rooftop tent installation include?
It should include vehicle and rack verification, exact mounting hardware, manufacturer-specific torque, clearance checks, full deployment testing, post-install inspection, documentation, and customer handover.
Can a shop install an RTT if the rack brand is unknown?
The installation should be paused until the rack’s capacity, intended use, and compatibility can be verified.
Is there a universal rooftop-tent torque specification?
No.
Torque depends on the fastener, bracket, rack interface, materials, and manufacturer’s instructions.
Is there a universal minimum crossbar spacing?
No.
Current manufacturer documentation from brands such as Thule and iKamper shows that spacing and bracket requirements vary by model.
Should a shop test-drive the vehicle after installation?
A short post-installation quality-control road check can help reveal abnormal noise or movement.
It does not replace the manufacturer-specified follow-up inspection or re-torque procedure.
When should a shop refuse or pause an RTT installation?
Pause the job when:
- vehicle load information cannot be verified;
- rack capacity is unknown;
- crossbar geometry is incompatible;
- rack components are damaged;
- correct hardware is unavailable;
- required clearance cannot be maintained;
- the shop cannot safely lift or position the product.
Should factory crossbars automatically be rejected?
No.
Some factory rack systems may be suitable for certain products while others are not.
Verify the exact vehicle, rack, tent, mounting hardware, and manufacturer requirements instead of applying a blanket rule.
Final Takeaway
A professional rooftop-tent installation is much more than mounting brackets and tightening bolts.
For an off-road shop, the complete job includes:
- verifying the vehicle;
- verifying the rack;
- measuring mounting geometry;
- checking clearances;
- planning the lift;
- using approved hardware;
- applying product-specific torque;
- deploying the tent;
- checking the system after installation;
- documenting the work;
- training the customer.
The most important rule is:
Do not begin installation until the complete vehicle-to-rack-to-tent load path is understood and verified.
And for suppliers serving professional dealers:
The easier a rooftop tent is to document, fit, install, inspect, and service, the easier it is for a professional shop to support consistently.