A roof top tent going on wrong is not a minor inconvenience — it’s a safety issue. You’re mounting a 100–170 lb structure to a vehicle that will travel at highway speeds, navigate rough terrain, and carry sleeping occupants. Getting the installation right the first time matters in a way that most guides fail to communicate.
The problem is that most installation guides treat this as a simple bolt-on process. They tell you to “tighten the bolts securely” without specifying torque values. They mention crossbar spacing without explaining how to calculate it for your tent. They assume you have two people available — and if you don’t, they offer one sentence about it being “more difficult” solo.
This guide covers what those articles skip: specific torque specifications, the crossbar spacing calculation, a genuine solo installation method, mounting orientation decisions, and the re-torque schedule that keeps your tent safely mounted through thousands of miles of driving. For the foundational roof top tent guide covering selection, setup, and long-term ownership, start here.
Quick Answer
To install a roof top tent: verify rack compatibility and dynamic load rating, set crossbar spacing to your tent’s mounting span specification, lift the tent onto the rack (two people or a hoist), align and hand-tighten brackets in a crisscross pattern, torque mounting bolts to 17–26 ft-lbs (8mm hardware), test stability, then re-torque after the first 50 miles.
Key Takeaways
- A basket-style factory rack cannot support an RTT — verify your rack type before installation day, not during it.
- Crossbar spacing must match your tent’s specified mounting span — check the manual before positioning the rack.
- Torque matters: most 8mm RTT mounting bolts require 17–26 ft-lbs in a crisscross pattern — a spec almost no installation guide provides.
- Solo installation is possible under 80 lbs with workstands; tents over 100 lbs need two people or a mechanical hoist.
- Re-torque after your first 50 miles — aluminum tent rails settle and bolts will need re-checking even if the initial install was correct.
- Ladder angle should sit at approximately 60 degrees from horizontal — test this before leaving the driveway.
1. Before You Start — The Pre-Installation Checklist
The most expensive installation mistakes happen before a single tool is picked up. Buyers discover mid-installation that their rack is incompatible, their crossbars are too close together, or a shark-fin antenna sits exactly where the tent needs to mount. Fifteen minutes of pre-installation verification prevents all of these.
The Four Critical Pre-Installation Checks
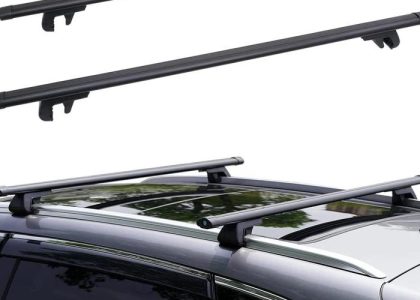
Check 1: Rack Type Verification
Not all roof racks support a roof top tent. This is the single most common installation surprise.
| Rack Type | RTT Compatible? | Notes |
|---|---|---|
| Factory crossbars (OEM) | Sometimes | Must verify load rating; often marginal |
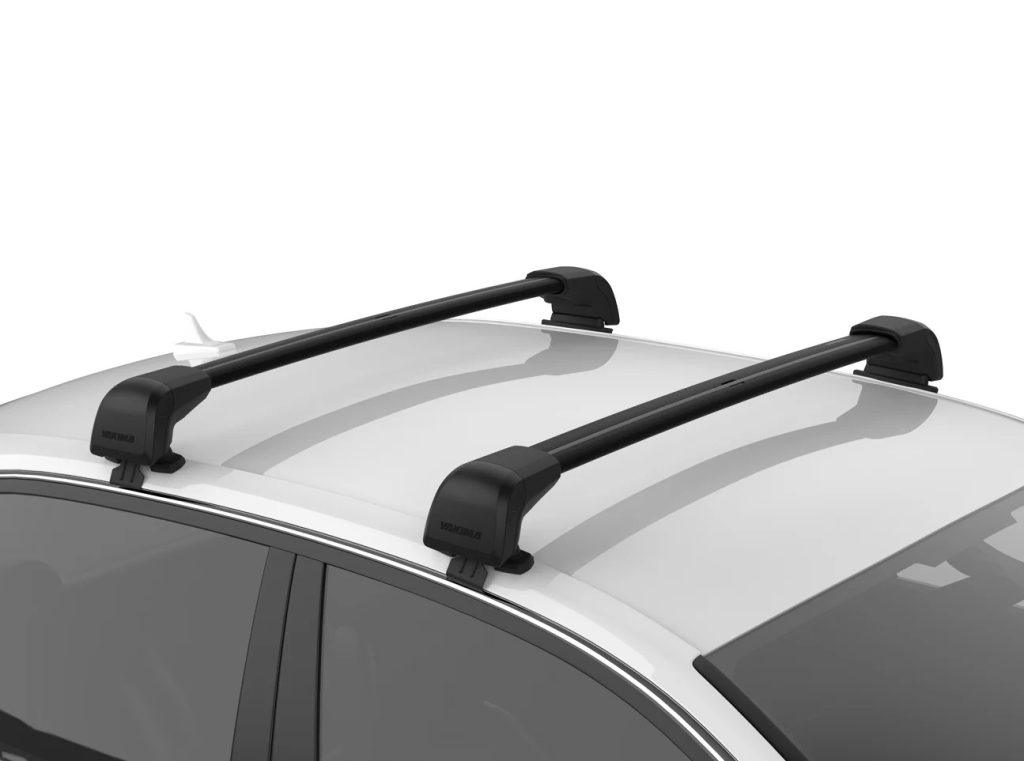
| Aftermarket crossbars (Thule, Yakima) | Yes | Verify weight capacity for your specific bars |
| Platform / expedition rack | Yes | Best option; highest load capacity |
| Truck bed rack | Yes | Eliminates roof load concern entirely |
| Basket-style rack | No | Cannot clamp RTT brackets securely — requires replacement |
| Bare roof (no rack) | No | A rack is non-negotiable |
If you have a basket rack, stop here. No bracket adapter makes a basket rack safe for RTT use. You need a crossbar or platform rack before proceeding. For detailed advice on selecting the right rack and tent combination plus compatibility checks, review our roof top tent buying guide.
Check 2: Dynamic Load Rating Calculation
Pull your vehicle’s dynamic roof load rating from the owner’s manual — not the static rating printed on the door jamb. Add your rack weight (typically 35–55 lbs for crossbars, 50–80 lbs for platform racks) to your tent’s packed weight. The total must fall below the dynamic rating with margin to spare.
Example: 4Runner dynamic rating: 165 lbs. Yakima crossbars: 38 lbs. iKamper Skycamp Mini: 120 lbs. Total: 158 lbs. Within spec — but barely. Any additional roof-mounted gear pushes this over the limit.
Check 3: Crossbar Spacing
Every RTT has a minimum and maximum mounting span listed in the manual. Your crossbars must be within this range. Measure center-to-center between your crossbars and compare to the tent specification. If they’re outside the range, reposition the bars before the tent arrives.
Check 4: Vehicle Obstacle Clearance
Walk around your vehicle and identify anything that protrudes above the roofline or interferes with tent deployment:
- Shark-fin antenna (common on 2015+ vehicles) — may require a relocation kit or rubber spacer
- Sunroof glass or moonroof panel — verify the tent doesn’t sit over the opening
- Third brake light housing on truck cabs — can conflict with rear-mount bracket position
- Tailgate swing radius — rear-mounted tents must clear the tailgate arc when opened
| Obstacle | Resolution |
|---|---|
| Shark-fin antenna | Rubber spacer pad or antenna relocation kit ($25–$60) |
| Sunroof | Position tent forward or rear of opening; verify clearance |
| Third brake light | Adjust bracket position; use offset hardware if available |
| Tailgate interference | Switch to side-mount orientation |
2. Tools and Hardware You Actually Need
Most installation guides list “wrenches and basic hand tools.” That’s not useful when you’re standing in the driveway trying to figure out whether you need an impact driver or a torque wrench. Here’s the specific kit.
Essential Tools (Do Not Substitute)
| Tool | Why It’s Needed |
|---|---|
| Metric socket set (8mm–19mm) | RTT hardware is almost universally metric |
| Torque wrench (essential) | The only way to verify bolt tightness accurately — a critical safety item |
| Measuring tape | Crossbar spacing verification |
| Carpenter’s level or bubble level | Confirms crossbars are level before mounting |
| Step stool or stable ladder | Working at roof height safely |
| Protective moving blankets | Protects vehicle paint during the lift |
Helpful but Not Mandatory
| Tool | When It Matters |
|---|---|
| Thread-locking compound (medium strength, e.g., Loctite 243) | Prevents bolt vibration loosening on hard-shell tents — worth using on all installations |
| Anti-seize compound | For stainless hardware on aluminum rails — prevents galvanic corrosion seizure |
| Second bubble level | Checking tent level in both axes simultaneously |
| Rubber mallet | Seating stubborn bracket hardware without damaging threads |
One firm rule: Do not use an impact driver to final-tighten RTT mounting hardware. Power tools make it impossible to feel when you’ve reached appropriate torque and make it trivially easy to strip aluminum rail threads or crack bracket hardware. Hand tools only for final tightening.
3. Rack and Crossbar Setup — Getting the Foundation Right
The tent can only be as stable as the rack it mounts to. Getting crossbar position, levelness, and load distribution right before the tent goes on is far easier than adjusting everything afterward with a tent in the way.
Setting Crossbar Spacing
- Find the mounting span specification in your tent manual — it will be listed as a minimum and maximum measurement (e.g., “mounting span: 28–36 inches, center to center”)
- Measure center-to-center between your current crossbar positions
- If adjustment is needed, loosen the crossbar foot hardware, slide to the correct position, and re-torque to the crossbar manufacturer’s specification
- Re-measure after tightening — bars often shift slightly during the torquing process
Why spacing matters: Mounting outside the specified span transfers load to the tent’s structural rails rather than the bracket clamping points. This stresses the rails under dynamic driving loads and can cause progressive loosening even when bolts are correctly torqued.
Verifying Crossbar Level
Place a level across both crossbars and verify they sit in the same horizontal plane. Even a 1-degree discrepancy causes the tent to sit visibly crooked — and more importantly, it means one side of the mounting hardware carries disproportionate load.
Most adjustable crossbar feet allow height correction of 5–10mm. Use this adjustment range to achieve level before proceeding.
Crossbar Type and Bracket Compatibility
| Crossbar Type | Compatible Brackets | Notes |
|---|---|---|
| Round bars | Universal clamp brackets | Verify clamp jaw size matches bar diameter |
| Square bars | Square jaw clamp brackets | Most common aftermarket setup |
| T-slot / channel bars | T-bolt sliding hardware | Cleanest installation; most secure |
| Aero blade bars | Manufacturer-specific clamps | Often brand-restricted (Thule to Thule, etc.) |
Check your tent’s included hardware against your crossbar type before installation. Bracket mismatch is the second most common installation-day discovery after the basket rack problem.
4. Lifting the Tent — Two-Person Method and Solo Method
This is the section every other guide reduces to one sentence. Getting a 100–170 lb tent onto a roof rack safely is a real physical challenge that deserves a real answer.
The Standard Two-Person Method
- Position one person at each end of the tent (front corner and rear corner on the same side)
- Lay protective moving blankets over the crossbars and vehicle roof edge
- Lift together on a count, keeping the tent level — an uneven lift creates torque on the structure
- Rest the tent on the crossbars temporarily with the brackets uninstalled — do not try to align and lift simultaneously
- Slide the tent to approximate final position before inserting bracket hardware
The blankets serve two purposes: paint protection and friction reduction for sliding. Do not skip them.
Solo Installation — Three Legitimate Methods
Solo installation is genuinely possible but depends heavily on tent weight. Here’s what actually works:
Method 1: Workstand / Sawhorse Method (Best for tents under 80 lbs)
Set up two sturdy sawhorses or adjustable workstands at vehicle roof height next to the vehicle. Lift one end of the tent onto the first stand, then the other end onto the second stand. Slide the tent laterally onto the crossbars from the stand level. This converts a vertical lift into a horizontal slide — dramatically easier for one person.
Method 2: Garage Hoist / Pulley System (Best for tents 80–170 lbs)
A 4:1 mechanical advantage pulley system (available for $40–$80) rigged to a garage ceiling joist or dedicated overhead rail can lift any production RTT solo. Attach lifting straps to the tent’s structural corners — not the fabric — and raise to crossbar height, then swing into position. This requires a suitable ceiling anchor point rated for dynamic loads.
Method 3: One Corner at a Time (Emergency Solo Method)
For lightweight hard shells only (under 70 lbs): place one corner on the crossbar with a moving blanket underneath, use that corner as a pivot point, and lift the opposite corner up and onto the second crossbar. This works — but the pivot corner must be padded thoroughly and the tent rail is under significant stress during the maneuver.
| Method | Weight Limit | Equipment Cost | Risk Level |
|---|---|---|---|
| Two-person lift | Any weight | None | Low |
| Workstand / sawhorse | Under 80 lbs | $30–$80 for stands | Low |
| Garage hoist / pulley | Under 170 lbs | $40–$80 for pulley | Low with correct anchor |
| One corner pivot | Under 70 lbs | Blankets only | Moderate — use carefully |
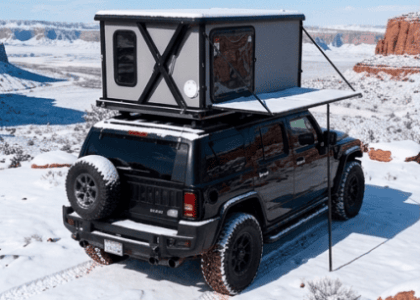
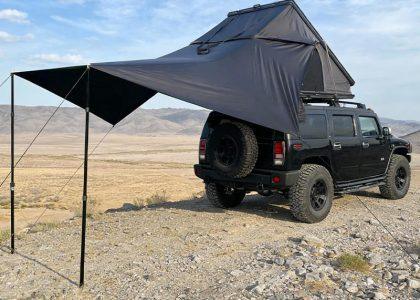
5. Mounting Orientation — Rear-Mount vs. Side-Mount
This decision is made before the tent goes on the rack — repositioning afterward means dismounting and restarting. Most buyers default to rear-mount without thinking through the implications.
The Core Trade-offs
| Factor | Rear Mount | Side Mount |
|---|---|---|
| Tailgate access | Blocked when tent is deployed | Full tailgate access retained |
| Ladder position | Rear of vehicle | Driver or passenger side |
| Campsite clearance | Needs open space behind vehicle | Needs clearance to one side |
| Aerodynamics | Slightly better (lower profile) | Marginally more drag |
| Best for | Trucks, vehicles with rear swing doors | SUVs, vehicles with tailgate access needs |
| Tent size suitability | Works for most tent widths | Larger tents (60″+) often require side mount |
The ladder angle test determines the final position. Once you have the tent roughly in position, extend the ladder fully and measure the angle it makes with the ground. Target: 60 degrees from horizontal. A steeper angle (closer to 90 degrees) makes the ladder unsafe and uncomfortable to climb — particularly with gear in hand. If the angle is too steep, slide the tent toward the rear until the ladder reaches the correct angle. If the ladder doesn’t reach the ground at all, you need a ladder extension section before finalizing position.
Real-world note: Rear-mount on a full-size pickup with the tent positioned far forward can result in a nearly vertical ladder. Always test ladder angle before torquing anything down.
6. The Step-by-Step Installation Sequence
With the rack set up, orientation decided, and tent lifted into position, this is the actual installation process. The sequence matters — doing it out of order means re-doing work.
Step 1: Position and Center
Slide the tent to its final position — correct orientation, ladder angle verified, tent centered left-to-right on the crossbars. Confirm the tent overhangs the vehicle symmetrically if relevant to your setup.
Step 2: Insert Bracket Hardware
Slide T-bolts or bracket assemblies into the tent’s mounting rail channels at each corner. For tents with fixed bracket positions, align the brackets with the crossbars. Do not tighten anything yet — all four corners should remain adjustable.
Step 3: Hand-Tighten in Crisscross Pattern
Tighten all four corners to finger-tight plus a quarter turn — front left, rear right, front right, rear left. The crisscross pattern ensures even clamping pressure across the tent base. Never tighten one corner fully before starting the others.
Step 4: Apply Thread-Locking Compound
Before final torquing, back each bolt out one turn, apply a small amount of medium-strength thread-locking compound (Loctite 243 or equivalent) to the threads, and re-hand-tighten. This step prevents vibration loosening during highway driving — skip it and you’ll be re-torquing after every significant road trip.
Step 5: Final Torque
Torque specification:
- 8mm bolts (most common): 17–26 ft-lbs (23–35 Nm)
- 10mm bolts: 25–35 ft-lbs (34–47 Nm)
- Always follow manufacturer specification if provided — these are fallback values when no spec is given
- Do not use power tools. Hand torque wrench only.
Torque in the same crisscross sequence as hand-tightening. Do a second pass at full torque after the first — bolts often release a small amount after the first pass as the bracket seats fully.
Step 6: Stability Test
Before deployment testing, perform a physical stability check:
- Push firmly down on each corner — zero deflection should be felt
- Push laterally on each side — no sliding or rocking
- Grab the tent and attempt to twist — no rotation
- Listen for creaking — any creak indicates an unseated bracket or undertorqued bolt
Step 7: Full Deployment Test
Open the tent completely and verify:
- Deployment clears all vehicle obstacles identified in the pre-check
- Ladder extends fully and reaches the ground at approximately 60 degrees
- Rainfly deploys without obstruction
- All zippers and latches function correctly
- Tent closes fully and latches secure without forcing
7. Post-Installation Checks and the Re-Torque Schedule
Installation isn’t complete when the tent is mounted — it’s complete after the first 50 miles of driving. This is the step that every guide skips and that most buyers discover the hard way.
Why Re-Torquing Is Necessary
Aluminum tent mounting rails are relatively soft compared to the steel bracket hardware that clamps against them. Under initial tightening, the aluminum compresses slightly — and continues to compress marginally as driving vibration settles the assembly. Bolts that were correctly torqued in the driveway will be measurably looser after the first highway drive.
This is not an installation error. It’s a material property of aluminum under dynamic load. The correct response is a scheduled re-torque, not tighter initial torquing (which risks stripping the rail threads).
Re-Torque Schedule
| Milestone | What to Check | Tool Needed |
|---|---|---|
| After first 50 miles of driving | All four mounting bolts | Torque wrench |
| After first off-road trip | All bolts + bracket seating + ladder hinges | Torque wrench + visual inspection |
| Every 3 months (regular use) | All bolts + tent rail condition | Torque wrench |
| Seasonally (occasional use) | Full inspection including rainfly hardware | Torque wrench + visual |
What to Check at Each Inspection
- Bolt torque: Re-torque to original spec if any bolt accepts more than 1/4 turn before resistance
- Bracket seating: Visual check that bracket faces sit flush against the crossbar
- Rail condition: Look for cracks, elongated bolt holes, or deformation in the mounting rail
- Ladder hinges: Lubricate hinge points with a silicone-based lubricant if any stiffness develops
- Rainfly attachment: Re-tension shock cords and check attachment point hardware
Security Options
If the vehicle will be parked in public or at a trailhead:
- Security bolt replacement: Replace standard hex bolts with security bolts (Torx Plus, pentalobe, or proprietary heads) that require specialized drivers — a deterrent against casual theft
- Cable lock through tent base: A 3/8″ braided cable through the tent base rail and around a crossbar prevents tent removal without disassembly
- Locking straps: Aftermarket locking straps (Thule, Yakima) that replace standard rack mounting straps with keyed locks
8. Common Installation Mistakes and How to Fix Them
These are the six errors that appear most frequently — either as installation-day discoveries or as post-trip problems that trace back to the original installation.
| Mistake | Why It Happens | How to Fix It |
|---|---|---|
| Using a basket rack | Buyer assumed any roof rack would work | Replace with crossbar or platform rack — no adapter solution exists |
| Crossbar spacing outside tent spec | Buyer didn’t check manual before install | Loosen feet, reposition to spec, re-torque crossbar hardware |
| No torque wrench used | “Hand tight felt secure enough” | Re-torque all bolts immediately with correct spec; add thread-locker |
| Skipping obstacle clearance check | Discovered after tent is mounted | Antenna relocation kit for shark fins; adjust position for other obstacles |
| Ladder angle too steep | Tent positioned too far forward | Slide tent rearward; reposition and re-torque; add ladder extension if needed |
| No re-torque after first trip | Guide didn’t mention it was needed | Check all bolts at next opportunity; expect to find loosening on aluminum rail tents |
Final Word
A correctly installed roof top tent is stable, quiet, and requires minimal attention beyond a quarterly torque check. One installed without proper torque specs, correct crossbar spacing, or a re-torque schedule will develop rattles, loosen progressively, and eventually shift — which is both a safety issue and an expensive problem to diagnose after the fact.
The steps in this guide take no longer than the generic version found in most installation articles. They just include the specifications and decisions those articles skip — the torque values, the ladder angle check, the solo lift method, the re-torque schedule.
Do it once, do it right, and the only time you’ll think about your tent’s mounting hardware again is during a routine quarterly check.
Frequently Asked Questions
Can I install a roof top tent by myself without help?
Yes, but the method depends on tent weight. Under 80 lbs, a workstand-to-crossbar sliding method works well for one person. Between 80–170 lbs, a mechanical pulley or garage hoist is the safer approach. Tents over 100 lbs lifted without mechanical assistance are a genuine injury risk for solo installers.
How tight should roof top tent mounting bolts be?
For 8mm bolts (the most common size), torque to 17–26 ft-lbs (23–35 Nm). For 10mm bolts, 25–35 ft-lbs. Always follow the tent manufacturer’s specific torque value if published — these ranges apply when no specification is given. Use a torque wrench, not an impact driver.
Can I mount a roof top tent on factory crossbars?
Sometimes. Factory crossbars must be rated for the tent’s weight — check the dynamic load specification, not the static one. Many OEM crossbars are rated at 100–165 lbs dynamic capacity, which is workable for lightweight hard shells but marginal for heavier models. Aftermarket crossbars from Thule or Yakima typically offer higher and more clearly documented load ratings.
How do I know if my tent is mounted in the right position?
Deploy the ladder fully and check the angle — it should sit at approximately 60 degrees from horizontal, reaching the ground comfortably. Push firmly on all four tent corners — there should be zero movement, deflection, or creaking. Open the tent fully and verify it clears all vehicle obstacles without contact.
What is the correct ladder angle for a roof top tent?
Approximately 60 degrees from horizontal. At this angle, the ladder is stable to climb with both hands free and a loaded daypack. Steeper than 70 degrees becomes uncomfortable and unsafe, particularly descending. If your ladder can’t achieve 60 degrees before reaching the vehicle, a ladder extension section resolves this for around $40–$80.
How often should I check the bolts on my roof top tent?
After the first 50 miles of driving (mandatory), after any off-road trip, and every 3 months for regular users. Aluminum mounting rails compress slightly under dynamic driving loads, causing bolts to loosen even when correctly torqued initially. This is normal material behavior — not an installation defect — and scheduled re-torquing is the correct management approach.
Do I need a torque wrench to install a roof top tent?
Yes. This is not optional safety theater. Under-torquing leaves bolts loose enough to vibrate out over time. Over-torquing strips aluminum rail threads — a repair that typically requires replacing the entire tent rail. A torque wrench accurate to ±4% costs $25–$50 and prevents both failure modes. It’s the most important tool in the installation kit.
What do I do if my vehicle has a sunroof or shark-fin antenna?
For a shark-fin antenna: a relocation kit moves the antenna to a rear bumper or fender position for $25–$60, or a rubber spacer pad raises the tent slightly above the fin. For a sunroof: position the tent so its mounting footprint sits forward or rear of the glass panel, maintaining clearance for the panel to slide or tilt. Verify clearance with the sunroof fully open before finalizing tent position.